
Microsoft’s Windows 10 operating system lets you change your PC’s time settings manually and automatically using Windows Settings. This article will walk you through how to do just that. Let’s get started.
Manually Change the Time on Windows 10
If you’d like to manually change your PC’s time, use the built-in Settings option.
To do so, you only need to click the Windows Start Menu and search for Settings. You can also Press the Win+i keys on your keyboard to launch it quickly. Once it launches, select “Time & Language.”

Once you get to the “Date & Time” page, make sure both “Set Time Automatically” and “Set Time Zone Automatically” options are turned off.
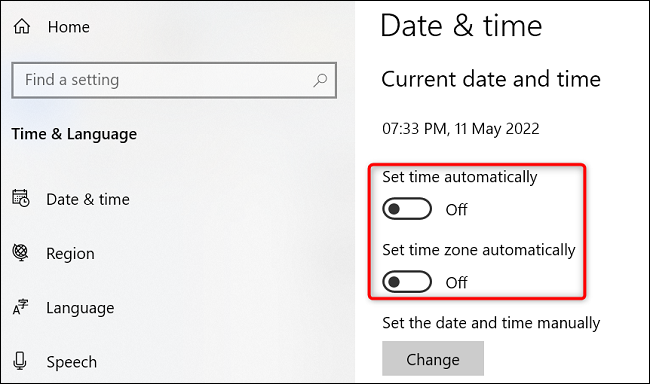
Right below the “Set the Date and Time Manually” option, click “Change.”

Once you do so, a “Change Date and Time” window will appear. Click the current date and time and set them to your preference. Once you have set your preferred date and time, at the bottom, click “Change.”

Your PC now utilizes your newly-specified time, and you’re all set.
Set the Time to Update Automatically on Windows 10
If you don’t want to use the manually-selected time on your PC, you can get Windows 10 to adjust the date and time automatically. Your PC syncs with Microsoft’s time servers to bring the current time for your region.
To use this option, go to the Windows Settings>Date and Time and enable the “Set Time Automatically” and “Set Time Zone Automatically” options.
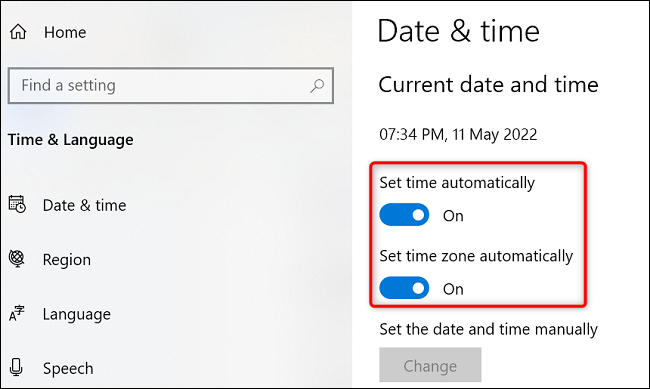
That’s it. Your PC will bring the present time from Microsoft’s servers and use that as the system time.
This blog post is powered by AIIT Solutions.