Close Menu

    Subscribe to Updates

    Get the latest creative news from FooBar about art, design and business.

    What's Hot

    Zoho Projects: Key Features and Overview

    October 27, 2025

    Zoho CRM Comprehensive Overview

    October 27, 2025

    Zoho Desk: Guide and Comparison

    October 27, 2025
    Facebook X (Twitter) Instagram
    Tech How To DoTech How To Do
    • Tech News
    • Home
    • Windows
      • Windows Server
    • Apple
    • Linux
    • WWW
      • E-commerce
      • Shopfiy
    • Mobile
      • Android
      • iOS
    • Cloud
    • Office
    • Tech Tips
    • Gaming
    • HRMS
      • Admin
      • Employee
    Tech How To DoTech How To Do
    Home»Tech Tips»Guide to Adding a Simple Product in WooCommerce
    Tech Tips

    Guide to Adding a Simple Product in WooCommerce

    Hamza WaseemBy Hamza WaseemApril 30, 2024Updated:October 27, 2025No Comments2 Mins Read
    Facebook Twitter Pinterest Telegram LinkedIn Tumblr WhatsApp Email
    Add New Product Woocommerce
    Share
    Facebook Twitter LinkedIn Pinterest Telegram Email

    Are you ready to expand your online store’s inventory? Adding a new product to your WooCommerce platform is a straightforward process. In this guide, we’ll walk you through each step with detailed instructions and accompanying images to ensure a smooth setup.

    Step 1: Accessing Product Settings

    To begin, log in to your WooCommerce dashboard. Once logged in, navigate to the Products tab located on the left-hand sidebar. From the dropdown menu, select “Add Product”.

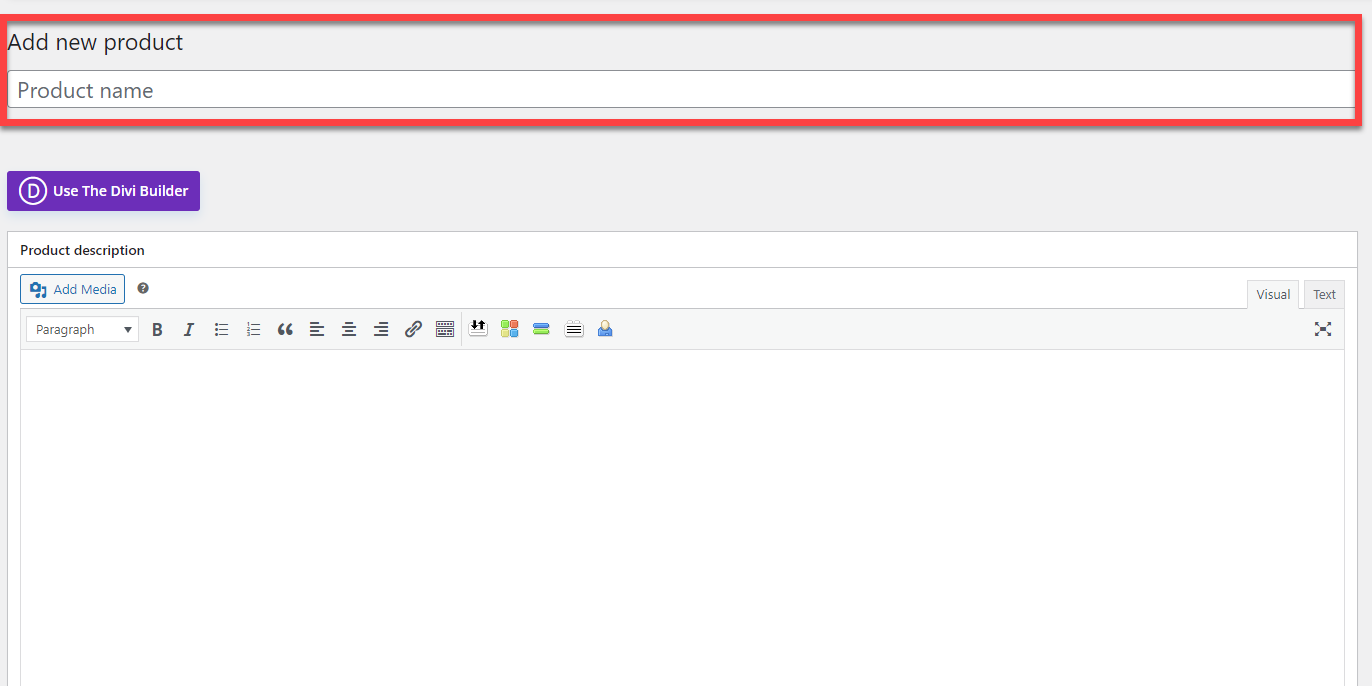
    Step 2: Entering Product Name

    In the Add New Product page, you’ll first encounter the Product Name field. Enter a clear and descriptive name for your product here. This name will be visible to your customers.

    Step 3: Setting Product Type

    Scroll down to the Product Data section. Here, you’ll find a dropdown menu labeled “Product Type”. Ensure that “Simple product” is selected. This indicates that your product does not have any variations such as different colors or sizes.

    Step 4: Specifying Regular Price

    Below the Product Type section, you’ll see the Regular Price field. Enter the price of your product here. This will be the standard price that customers will pay unless you offer discounts.

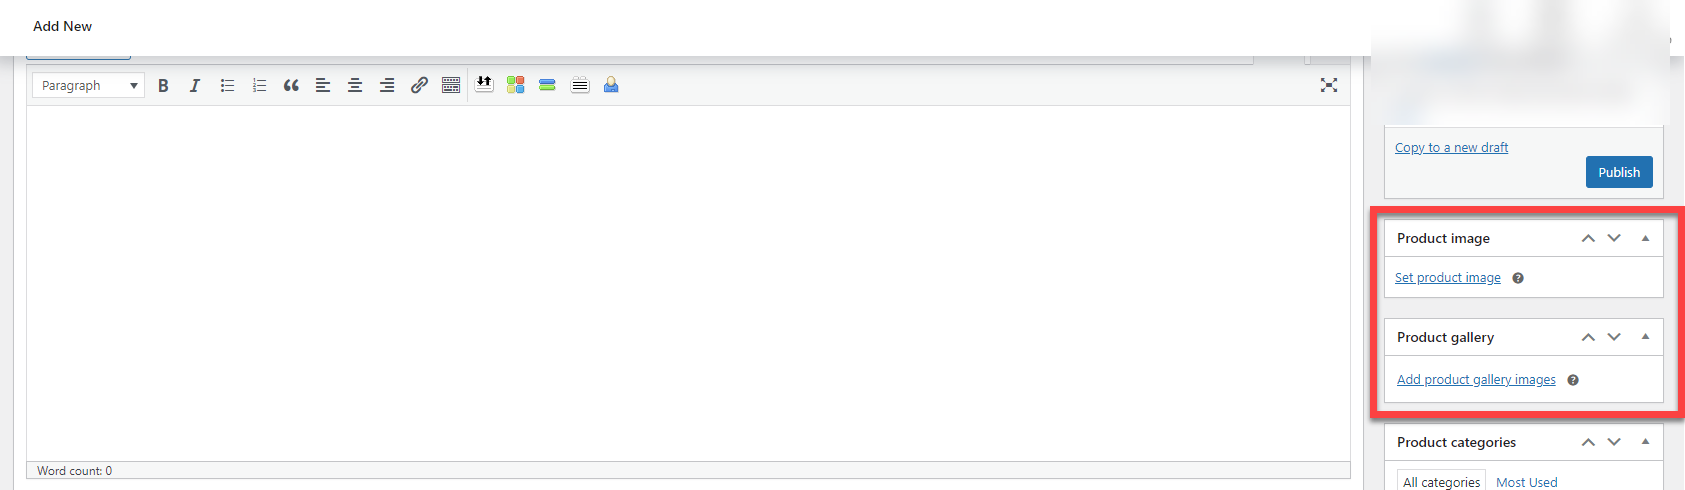
    Step 5: Adding Product Image

    Now it’s time to add an image for your product. In the Product Image panel, click on the “Set product image” link. This will prompt you to select an image from your Media Library or upload a new one.

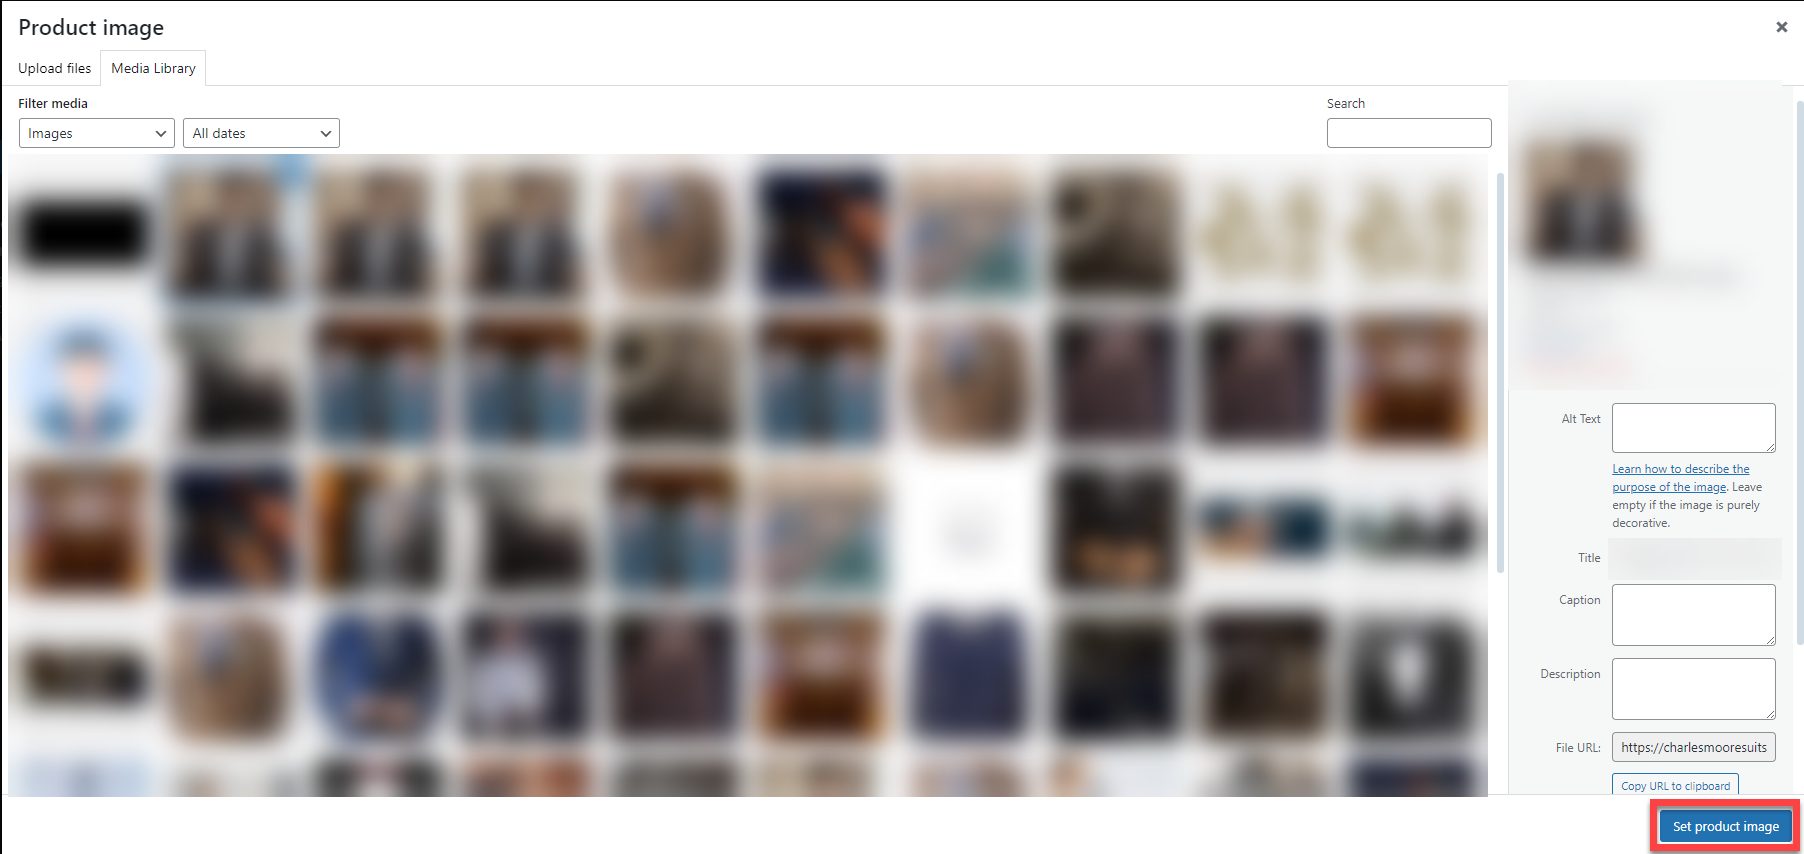
    Step 6: Selecting Product Image

    Choose the image that best represents your product and click the “Set product image” button. This image will be displayed alongside your product listing on your website.

    Step 7: Publishing Your Product

    After filling in all the necessary details, scroll up to the top of the page. In the Publish panel on the right-hand side, click the “Publish” button to make your product live on your website.

    Step 8: Viewing Your Product

    Congratulations! You’ve successfully added a new simple product to your WooCommerce store. To view your product as it appears to customers, click on the “View product” link at the top of the page.

    By following these step-by-step instructions and utilizing the provided images, you can seamlessly expand your online store’s offerings and provide customers with an enhanced shopping experience.

    Add New Product Inventory Product Woocommerce
    Share. Facebook Twitter Pinterest LinkedIn Tumblr Email
    Hamza Waseem
    • Website

    Related Posts

    Zoho Projects: Key Features and Overview

    October 27, 2025

    Quantum Computing: Transforming Technology and Everyday Life

    October 28, 2024

    Automate Ticket Creation in Zoho Desk from Incoming Emails

    October 23, 2024

    Host Your Static Website on Cloudflare Pages with Custom Domain

    October 21, 2024

    Why Gaming in Workplace Boosts Productivity

    October 9, 2024

    MovieGen: Meta’s Groundbreaking AI Model Can Create Videos from Text

    October 7, 2024

    Comments are closed.

    Recent Posts
    • Zoho Projects: Key Features and Overview
    • Zoho CRM Comprehensive Overview
    • Zoho Desk: Guide and Comparison
    • Change your SharePoint domain name
    • HRMS Assets Module: Features, Management, and User Guide
    Categories
    • Android
    • Apple
    • Beauty
    • Building
    • Business
    • Construction
    • Design
    • Education
    • Fashion
    • Food
    • Games
    • Health
    • Lifestyle
    • Mobile
    • Nature
    • News
    • Photo
    • Politics
    • Sports
    • Tech News
    • Tech Tips
    • Technology
    • Travel
    • Video
    Tags
    Business Case Study Creative Education Insights SEO Marketing Solutions
    © 2025 Tech How To Do. Develop, Designed and Maintained by AIIT SOLUTION
    • Home
    • Tech
    • Gadgets
    • Mobiles
    • Buy Now

    Type above and press Enter to search. Press Esc to cancel.

    Ad Blocker Enabled!
    Ad Blocker Enabled!