

Adding and formatting images in WordPress is a crucial step in enhancing the visual appeal of your website. Images can help convey your message more effectively and make your content more engaging for your audience. Here’s a step-by-step guide on how to add and format images in WordPress:
1. Access Your WordPress Dashboard
- Log in: Start by logging into your WordPress Dashboard using your credentials.
- Navigate to the Page/Post: Go to the specific page or post where you want to add an image and click on the “Edit” button.
2. Add an Image Block
- Insert a Block: While in the page/post editor, click the “+” icon to add a new block.
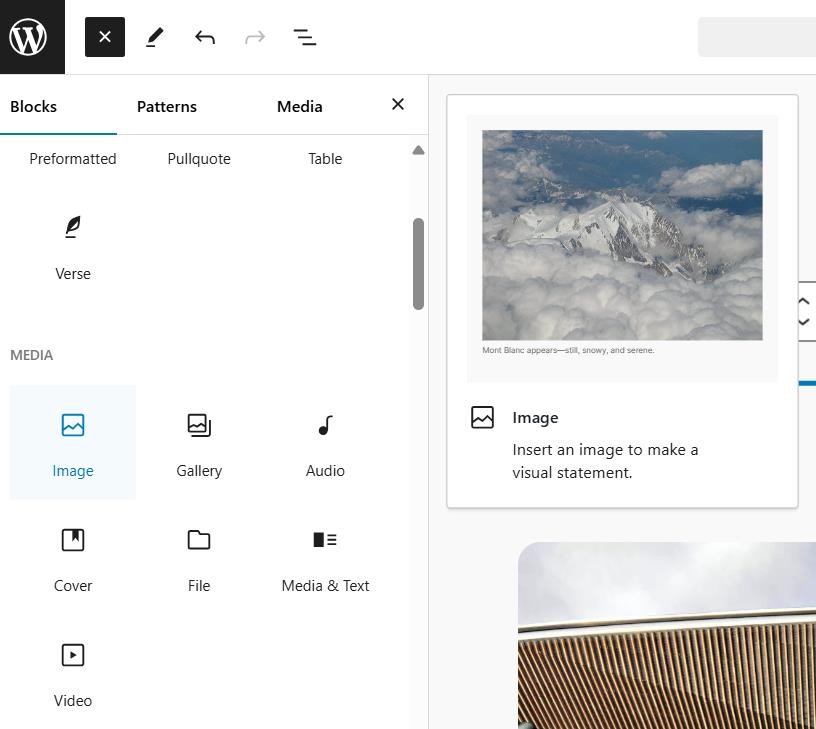
- Select Image Block: From the block library, choose the “Image” block. This block is specifically designed for inserting and formatting images in your content.
3. Upload or Select an Image
- Upload from PC: You can upload an image directly from your computer by clicking the “Upload” button. Choose the image file you want to add.
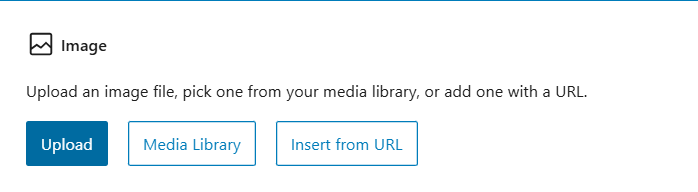
- Insert via URL: If you have an image hosted online, you can insert it by selecting the “Insert from URL” option and pasting the image’s web address.
- Use Media Library: Alternatively, you can select an image from your WordPress Media Library. This is useful if you’ve previously uploaded images and want to reuse them.
4. Format Your Image
- Alignment Options: Once your image is added, use the alignment options (left, center, right) to position the image as you want it to appear within your content.
- Resize the Image: You can adjust the image size directly within the editor. Click and drag the corners of the image to make it larger or smaller.
- Add Alt Text: For SEO and accessibility purposes, always add descriptive alt text to your images. This helps search engines understand the content of the image and improves the experience for users with screen readers.
5. Customize Image Settings
- Link to Media: You can link the image to its media file, a custom URL, or an attachment page by adjusting the settings in the block options.
- Add a Caption: If necessary, add a caption below the image to provide additional context for your readers.
6. Save and Preview Your Changes
- Preview the Page/Post: Before making your changes live, click the “Preview” button to see how your image looks on the actual page.
- Save/Publish: If you’re satisfied with the formatting, click “Save” or “Publish” to make the changes live on your website.
7. Update and Optimize Regularly
- Keep Content Fresh: Regularly update your images to keep your content fresh and relevant.
- Optimize Image Sizes: Compress images to reduce load times and improve site performance without sacrificing quality.
By following these steps, you can effectively add and format images in WordPress, enhancing your site’s visual appeal and improving the overall user experience.